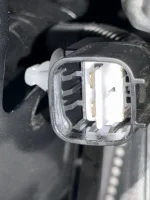
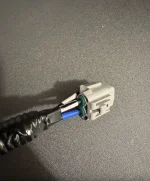
It seems the 2025 4Runner Trailhunter and some PRO models also have a similar Aux setup as the 2025 OT, with the Aux 1 @40 A, Aux 2 @20 A, Aux 3 @15 A, Aux 4 @10 A. In reading some of the 4Runner G6 forums many, but not all, these models are coming with the pigtails in boxes, made in Mexico. I should have my 25 OT in about a month and will see if the Toyota pigtails work on the GX, if Lexus does not have them yet. The Toyota pigtails are different sizes for Aux 1 & 2 than 3 & 4 since they have more amps. The Toyota part numbers are:
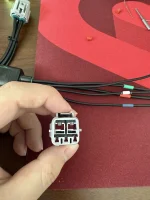
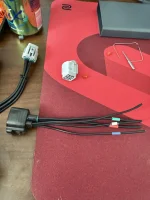
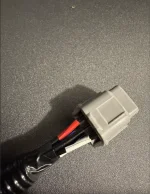
PT974-89251
Hi AUX Wire Harness
PT974-89252
Low AUX Wire Harness
One is for Hi Aux 1-2, the other is Low Aux 3-4. Wonder when Lexus will have the pigtails ready, but just maybe the Toyota ones will work. The only downside would be that the wire colors are slightly different for the assigned Aux #'s.