Since I didn't find anyone that had posted about this for the GX550, I thought I would document the process a bit.
My last backwoods camping vehicles was an LR4 with solid wading depth from the factory. Not seeing much info on the GX wading depth, I started digging and was surprised to find Toyota and Lexus essentially have no raised breathers on the rear differentials.
Fortunately, I was able to find quite a few good resources from other models that made this pretty straight forward!
Good info here:
https://www.toyota-4runner.org/5th-gen-t4rs/240134-tying-all-breathers-together-arb-170112-a.html
https://www.toyota-4runner.org/5th-gen-t4rs/215741-rear-differential-breather-mod-dummies.html
I did a little bit of digging and crawling around underneath the GX to try and identify all the breather locations and see what needed to be relocated to higher ground.
From the front back -
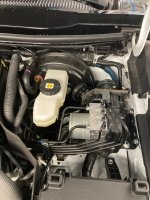
Front Differential - easily located and routed pretty high in the engine bay on the driver's side between the engine and the air intake filter box. I forgot to grab a picture beforehand, but here's a sneak peak ahead showing the overall area.


Transmission - Not as easy to see from underneath, but finally located the termination point high up on the center of the firewall. Transmission is the clear plastic breather.


Transfer Case / Center Diff Locker - Pretty easy to locate on the Transfer Case, but hard to trace. Two one-way metal check valves just like the front differential breathers, terminate alongside the Transmission Breather (seen above).

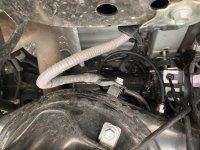
Rear Differential - Same as all the other Toyota/Lexus models, right on the top of the Rear Differential.


I was surprised not to find any additional hardware or breathers from the rear differential locker. There were a few electrical connections on the side of the differential housing, but not very large, and no breather lines.
If I missed something here, someone please let me know!
I removed the spare tire for some extra visibility and to search for any other breathers. Plus, it gave me a good opportunity to get familiar with the functionality. Good news is it worked great and I learned that I want to put the tool kit with our other recovery gear when off roading to avoid having to unload too much of the cargo area to get to them.
I went with the ARB Diff Breather Kit which worked great and came with everything I needed, mostly.
The mounting location I chose was on the driver's side of the firewall under the cover for the brake booster and fluid reservoir. There was a small item that looked like it was a horn/beeper for the doors mounted on a single strip of metal and attached on one end.
I fabbed up a replacement bracket and extended it to provide a mounting point and avoid drilling holes in the GX with the ARB provided self-tapping screws.

After watching ARB's install video and a few others, it was clear that the fittings would directly replace the one on the rear differential and the hose from the ARB kit could easily be inserted into the existing rubber hose on for the front differential after removing the original breather.
The OEM rubber hose was 1/4" ID and the OD of the ARB line was 1/4", providing a nice snug fit.
In the engine bay for the front differential the rubber hose provided just enough flex to avoid any additional fittings and allowed clean routing to the new breather location.

For the rear, I started routing the hose from the mounting location down into the engine bay, and quickly onto the top of the frame under the driver's side of the cab toward the back and across the cross member just forward of the rear wheel well.
I would take a little extra time to make sure the route used is as direct and free of rubbing areas - I had to reroute each end to get it where I wanted after not being too diligent on the initial run.
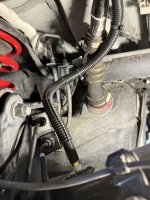
Once at the rear I left a decent coil (crudely outlined in red using paint), probably larger than necessary based on the excess of the brake lines, then inserted the hose in the quick push connect fitting from the ARB kit. Appropriately placed zip ties all the way back to the front should prevent any unwanted movement.

Back in the engine compartment - Final trimming of the hoses followed by installation of the new bracket and mounted ARB manifold only left making the two connections of the hoses.
All finished!

I thought it turned out all right.
I hope someone else finds this useful.
My last backwoods camping vehicles was an LR4 with solid wading depth from the factory. Not seeing much info on the GX wading depth, I started digging and was surprised to find Toyota and Lexus essentially have no raised breathers on the rear differentials.
Fortunately, I was able to find quite a few good resources from other models that made this pretty straight forward!
Good info here:
https://www.toyota-4runner.org/5th-gen-t4rs/240134-tying-all-breathers-together-arb-170112-a.html
https://www.toyota-4runner.org/5th-gen-t4rs/215741-rear-differential-breather-mod-dummies.html
I did a little bit of digging and crawling around underneath the GX to try and identify all the breather locations and see what needed to be relocated to higher ground.
From the front back -
Front Differential - easily located and routed pretty high in the engine bay on the driver's side between the engine and the air intake filter box. I forgot to grab a picture beforehand, but here's a sneak peak ahead showing the overall area.
Transmission - Not as easy to see from underneath, but finally located the termination point high up on the center of the firewall. Transmission is the clear plastic breather.
Transfer Case / Center Diff Locker - Pretty easy to locate on the Transfer Case, but hard to trace. Two one-way metal check valves just like the front differential breathers, terminate alongside the Transmission Breather (seen above).
Rear Differential - Same as all the other Toyota/Lexus models, right on the top of the Rear Differential.
I was surprised not to find any additional hardware or breathers from the rear differential locker. There were a few electrical connections on the side of the differential housing, but not very large, and no breather lines.
If I missed something here, someone please let me know!
I removed the spare tire for some extra visibility and to search for any other breathers. Plus, it gave me a good opportunity to get familiar with the functionality. Good news is it worked great and I learned that I want to put the tool kit with our other recovery gear when off roading to avoid having to unload too much of the cargo area to get to them.
I went with the ARB Diff Breather Kit which worked great and came with everything I needed, mostly.
The mounting location I chose was on the driver's side of the firewall under the cover for the brake booster and fluid reservoir. There was a small item that looked like it was a horn/beeper for the doors mounted on a single strip of metal and attached on one end.
I fabbed up a replacement bracket and extended it to provide a mounting point and avoid drilling holes in the GX with the ARB provided self-tapping screws.
After watching ARB's install video and a few others, it was clear that the fittings would directly replace the one on the rear differential and the hose from the ARB kit could easily be inserted into the existing rubber hose on for the front differential after removing the original breather.
The OEM rubber hose was 1/4" ID and the OD of the ARB line was 1/4", providing a nice snug fit.
In the engine bay for the front differential the rubber hose provided just enough flex to avoid any additional fittings and allowed clean routing to the new breather location.
For the rear, I started routing the hose from the mounting location down into the engine bay, and quickly onto the top of the frame under the driver's side of the cab toward the back and across the cross member just forward of the rear wheel well.
I would take a little extra time to make sure the route used is as direct and free of rubbing areas - I had to reroute each end to get it where I wanted after not being too diligent on the initial run.
Once at the rear I left a decent coil (crudely outlined in red using paint), probably larger than necessary based on the excess of the brake lines, then inserted the hose in the quick push connect fitting from the ARB kit. Appropriately placed zip ties all the way back to the front should prevent any unwanted movement.
Back in the engine compartment - Final trimming of the hoses followed by installation of the new bracket and mounted ARB manifold only left making the two connections of the hoses.
All finished!
I thought it turned out all right.
I hope someone else finds this useful.


