EcoFlow 800W Alternator Charger install

iridium

New member
Feb 28, 2025
8
Media
3
0
Canada
I'd like to install an EcoFlow 800W Alternator Charger (to charge a Delta 3 battery pack) and route the cable from the engine bay to the rear seats (underneath the door sills).

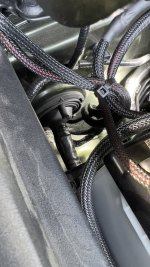
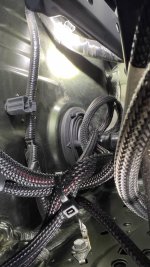
I'm trying to find the best way to pass the cable from the battery in the engine bay into the cabin through a port of some sort. I found this post on the Land Cruiser forum which shows a hole with a grommet on the driver's side, I'm assuming we have the same hole on the GX 550 but that specific one wouldn't be wide enough (the cable is 20mm wide).

Has anyone here done the install or know if there are better engine bay access?
 
You can pass the cable through the firewall on the passenger side and route it under the passenger seat. My Jackery units are sitting on the rear passenger seat so my solar, Starlink, and RTT cables were routed from the outside to underneath the passenger seat with easy access to the Jackery units.

I'm waiting for the Jackery version of the alternator charger so I can fast charge the units on cloudy/rainy days. Eventually, the rear seats will be removed for more storage and to arrange things better.
 
@nonamex , is this the grommet you were talking about (behind the battery)? If so, I'm afraid it's slightly too small for the DC cable to go through.

PXL_20250515_230831750.cleaned.jpg
PXL_20250515_230959068.cleaned.jpg
 
Last edited:
@nonamex , is this the grommet you were talking about (behind the battery)? If so, I'm afraid it's slightly too small for the DC cable to go through.

View attachment 11393View attachment 11394
That should be the on he's referring to. Most people will punch a hole in it to pass their wires through, and then seal the opening with some RTV. Are you saying your wires are too big to do that? What gauge we talking about?
 
Where the pigtail is? I'd rather avoid cutting into that if there's a free lone one around.
1747415883786.png
we are talking about this thing with the wire loom coming out right? That is the grommet.

The grommet is probably riding on a little lip of the firewall and is holding itself in place by this lip. If you push it from the side and deform it a bit, you could probably squeeze your wires between the grommet and the firewall lip without cutting the grommet. There are some drawbacks:

1. It wont be as waterproof and youll need a lot of RTV to seal out water.
2. The wire is more likely to chafe so you will really want to make sure its protected with some sort of wire loom.
 
Last edited:
Yeah, I was hoping not to have to cut into that if there was larger hole similar to the one right above it (where I removed the grommet). If not, then I'd use the one you mentioned, but I'm just making sure there isn't any other options before I start cutting...
 
Updated my post above with an alternative to cutting. The other option is to run the wires up through the rocker and under the doorsills as @nonamex suggested. This will require removing the doorsill trim. I have not verified this myself but most Toyotas have a similar setup. The benefit to doing it this way is the grommet is not shared with anything else, so if you ever want to completely reverse your changes you can just buy another OEM grommet from Toyota. I think that sums up all your options but happy to be proven wrong.
 
Hopefully, these photos will help. My cables are similar in size so you should be able to fit yours through the grommet.
 

Attachments

  • IMG_3345.jpeg
    IMG_3345.jpeg
    197.3 KB · Views: 7
  • IMG_3341.jpeg
    IMG_3341.jpeg
    171.5 KB · Views: 7

GX550 Poll

  • Nope

    Votes: 0 0.0%
  • Yup

    Votes: 4 80.0%
  • Yup, but here’s how to improve it…

    Votes: 1 20.0%
Back
Top