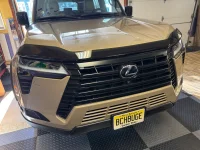
Gauging interest - Lexus Hood Bug Deflector from Australia

Are you interested if priced around $300 before stateside shipping

  • Yes, I can pick up in Los Angeles (Burbank area)

    Votes: 7 41.2%
  • Yes, but I need it shipped.

    Votes: 10 58.8%

  • Total voters
    17
  • Poll closed .
Mine looks like the stock photos. Lol IMG_9377.webp
 
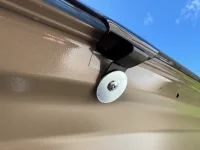
Received it today, installed it but I put the two inner clips on backwards and couldn’t get them off to reverse them so did a Macgyver and drilled a couple of holes in the hood, put two big washers with a couple of screws, works great . Thanks again for the Group Buy! Looks great against the earth color!
 

Attachments

  • IMG_0515.webp
    IMG_0515.webp
    228.5 KB · Views: 38
Yep, just two small holes, trying to get the deflector off was a pain and I didn’t want to break it when I knew I reversed the middle two brackets. Tried to bend them up to get close to the holes in the hood but not enough room, so I did my thing, looks great!
 
Got my Deflector from @munkeeboi today, smooth, great transaction and am happy with it! I don't often do posts with pics etc. but thought I would try on this one.
Install notes:
1. Instructions are pretty clear, just be patient and read them fully and then follow them
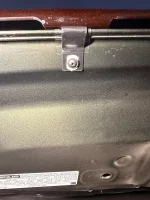
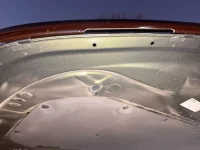
2. TAKE YOUR TIME with lining everything up and making sure the "Fixed Clip" line up with holes (2) on underside of hood
a. I tried to work from right to left and as I progressed the line up changed and I had to re-work it...not fun, these clips are tight!
3. Don't be afraid to use a small rubber mallet, I used a small screwdriver to spread the clip and tap with mallet to get them started.
4. I don't like the "Screw Plugs" for the "Fixed Clips" and will probably do something different, but even without them the deflector is solid
a. This might just be me and nobody else will have a problem, but getting the "Screw Plugs" in the " Fixed Clips" and keeping them from spinning while trying to screw them in was something I ran out of patience for tonight.
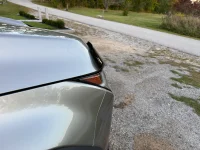
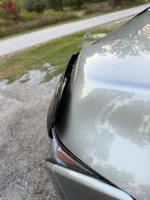
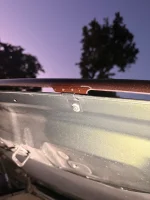
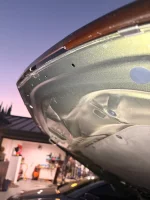
5. You can see from the pics that the only "touch" on the vehicle is at the attachment points that are protected by the included "Anti Abrasive Tape" which is basically a very rugged 3M clear PPF
6. I have had very similar type deflectors on many vehicles before and while I can't quantify it, I feel strongly they have decreased bugs, rocks, etc. on the hood and windshield.
7. I think it looks awesome on my color combination!

Cheers! and good luck everyone!
 

Attachments

  • Deflector standoff middle.webp
    Deflector standoff middle.webp
    76.3 KB · Views: 40
  • Deflector standoff passenger.webp
    Deflector standoff passenger.webp
    229 KB · Views: 36
  • Deflector standoff driver.webp
    Deflector standoff driver.webp
    81.1 KB · Views: 35
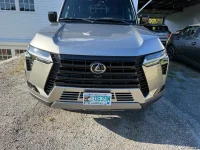
  • No deflector front view.webp
    No deflector front view.webp
    508.8 KB · Views: 41
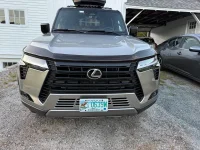
  • Deflector front view.webp
    Deflector front view.webp
    470.6 KB · Views: 36
Anybody from GB1 volunteer to take pics showing the correct orientation of said clips so us lowly GB2 peeps don't reverse the brackets and end up drilling holes in our hoods? :)
 
Got my Deflector from @munkeeboi today, smooth, great transaction and am happy with it! I don't often do posts with pics etc. but thought I would try on this one.
Install notes:
1. Instructions are pretty clear, just be patient and read them fully and then follow them
2. TAKE YOUR TIME with lining everything up and making sure the "Fixed Clip" line up with holes (2) on underside of hood
a. I tried to work from right to left and as I progressed the line up changed and I had to re-work it...not fun, these clips are tight!
3. Don't be afraid to use a small rubber mallet, I used a small screwdriver to spread the clip and tap with mallet to get them started.
4. I don't like the "Screw Plugs" for the "Fixed Clips" and will probably do something different, but even without them the deflector is solid
a. This might just be me and nobody else will have a problem, but getting the "Screw Plugs" in the " Fixed Clips" and keeping them from spinning while trying to screw them in was something I ran out of patience for tonight.
5. You can see from the pics that the only "touch" on the vehicle is at the attachment points that are protected by the included "Anti Abrasive Tape" which is basically a very rugged 3M clear PPF
6. I have had very similar type deflectors on many vehicles before and while I can't quantify it, I feel strongly they have decreased bugs, rocks, etc. on the hood and windshield.
7. I think it looks awesome on my color combination!

Cheers! and good luck everyone!

The screw plugs fit the entirety of the 2 rectangular shaped openings in the center brackets. If you press them in fully, they won’t spin and will make screwing it in that much easier

It’s dark outside already, but here’s some pics of how only the clips go around the edge of the hood. You can see some of my 3m strips are off center. I aligned it thinking the deflector plastic tabs hooked around the hood edge, not sitting directly on top off. My hood is ppf’d already and o got like 90% of each clip so I wasn’t too concerned.

Please download the instructions I posted in the sales thread to review them in detail.
 

Attachments

  • IMG_9419.webp
    IMG_9419.webp
    280.6 KB · Views: 33
  • IMG_9421.webp
    IMG_9421.webp
    91.1 KB · Views: 29
  • IMG_9422.webp
    IMG_9422.webp
    194.3 KB · Views: 29
  • IMG_9420.webp
    IMG_9420.webp
    100 KB · Views: 33
Last edited:
Anybody from GB1 volunteer to take pics showing the correct orientation of said clips so us lowly GB2 peeps don't reverse the brackets and end up drilling holes in our hoods? :)
Before you add the two center clips to the deflector, hold it up to the hood and prefit the clips to make sure the opening is or will be closest to the hood when mounted. I reversed them and the clips were about a half inch away from the hood. Once I mounted the deflector, I didn’t want to break it trying to get it off, so I drilled a couple of small holes and put a couple of big washers on them which did the job.
 

Attachments

  • IMG_0517.webp
    IMG_0517.webp
    131.6 KB · Views: 35
Before you add the two center clips to the deflector, hold it up to the hood and prefit the clips to make sure the opening is or will be closest to the hood when mounted. I reversed them and the clips were about a half inch away from the hood. Once I mounted the deflector, I didn’t want to break it trying to get it off, so I drilled a couple of small holes and put a couple of big washers on them which did the job.
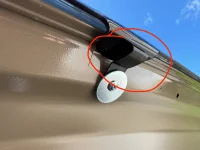
hmmmmm.....That clip orientation in your photo looks correct to me. The plastic portion of the deflector shouldn't be going under the hood lip. Look at image 9419 and 9421 that I posted above. The part I circled in your photo should be the portion that goes around the leading hood edge.

The plastic being wedged between your hood and grill, might cause some uneccessary stress at the center mounting points.
 

Attachments

  • IMG_0517 copy.webp
    IMG_0517 copy.webp
    122.5 KB · Views: 33
Perfect.. so one vote for drilling and bolting to the hood and one vote for tossing the clips and applying a thick bead of JB weld and clamping it directly to the paint. I figure by the time we GB2 folks get our deflectors we oughta have this property sorted.
 
hmmmmm.....That clip orientation in your photo looks correct to me. The plastic portion of the deflector shouldn't be going under the hood lip. Look at image 9419 and 9421 that I posted above. The part I circled in your photo should be the portion that goes around the leading hood edge.

The plastic being wedged between your hood and grill, might cause some uneccessary stress at the center mounting points.
When I put the deflector on, I had at least a half of an inch between the bottom of the hood and the clip; that's why I figured I had them reversed because there was no way the hardware the came with would work with those gaps so, as I said, I improvised and it worked.
 
Commenting in case someone backs out of their Deflector or a GB3 happens. Would really like one for my Overtrail I just picked up.
 
Any thoughts about how to remove the Lexus logo off the deflector? Did not want to use a chemical that might impact the surface. Was thinking just a black magic marker as an not perfect solution.
 
I finally got around to installing mine today. It was an easy install and I'm happy having the protection.

Thank You @munkeeboi.

IMG_5556.webp


IMG_5557.webp
 
Here are some pictures that I took when I visited Munkeeboi down in Los Angeles.

I’m doing the install currently.

Will also post pictures once I’m done.

IMG_5515.webp


IMG_5513.webp


IMG_5512.webp

IMG_5511.webp


IMG_5510.webp


IMG_5508.webp


IMG_5507.webp
 

Users who are viewing this thread

GX550 Poll

  • Yes, I can pick up in Los Angeles (Burbank area)

    Votes: 7 41.2%
  • Yes, but I need it shipped.

    Votes: 10 58.8%
Back
Top Bottom