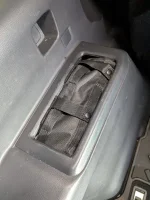
GX 550 overtrail air compressor hose (4 Viewers)

I bought an ARB portable compressor. The Lexus built-in is so overpriced - and I'd rather carry the unit when I need it versus more weight.
 
All good reasons, but if you have one it works very nice, airing up and down. Plus you get an extra digital "L" logo on the display when it's powered on.

Agree, on the 3d print! It is a snug fit and doesn't move or rattle as is.
 
All good reasons, but if you have one it works very nice, airing up and down. Plus you get an extra digital "L" logo on the display when it's powered on.

Agree, on the 3d print! It is a snug fit and doesn't move or rattle as is.
WOW a GLOWING 'L' !!!!! That would complete my life!
 
A bigger practical storage bin on each side looking finished would great!
Ok, here it is. Just finished toiling in the work shop cutting out the cup holder so I (we) can keep the compressor kit neatly put away and accessable above the driver's side (LH) rear wheel well unused air space.
1) Remove snap in 3rd row cup holder plastic.
PXL_20260112_005314768.jpg

2) Install compressor kit bag.
PXL_20260112_005241269.jpg

3)To make it look trimmed out properly, cut out the pocket of the insert. I used an oscillator flat blade saw. Scribe a line or mentally follow a line where the radio of the ribs connects to the pocket wall. This will allow the trimmed part to be supported and leave a 1/4" lip into the well. Do NOT cut the snap and trim alignment posts. You need to work around them. I had to cut from both sides of the pocket to get the tool to fit.
PXL_20260111_232443912.jpg

PXL_20260111_234238470.jpg

After cutting the edges need to be filed,sanded and trimmed to clean up. Note that the top decorative surface scuffs very easy. I touched up the scratched areas with a black sharpie.
PXL_20260111_234740079.jpg
PXL_20260112_004245328.jpg
PXL_20260112_004202234.jpg

4)The fun part, snap it back on and test it out. I found inserting the bag towards the front of the pocket at 45 deg and then stuffing the back down worked well. You can rotate the bag so the logo and "Compressor Kit" name is up or have the grab handle up to help with extraction. I could not easily unzip the bag and just remove the hose. There are also 3 molle snap loops that could be used if facing up.
PXL_20260112_005322737.jpg
PXL_20260112_005408672.jpg
PXL_20260112_005547348.jpg
PXL_20260112_010642271.jpg
PXL_20260112_005850761.jpg
PXL_20260112_010801010.jpg
PXL_20260112_005614101.jpg
5) The privacy shade covers it from view (or fading the bag material)!
PXL_20260112_011043571.jpg
 

Attachments

  • PXL_20260111_234228004.webp
    PXL_20260111_234228004.webp
    193.4 KB · Views: 72
  • PXL_20260112_010036285.webp
    PXL_20260112_010036285.webp
    198.8 KB · Views: 62
Last edited:
FYI, the opening is snug as it is so any side walls with a 3D printed part may make fitment to tight. I recently did an overland trip and used the compressor many times going up and then down in pressures. It was fantastic. It was convenient enough to make use of it quickly in cases I would have otherwise dealt with the pressure I was at.
 

Users who are viewing this thread

GX550 Poll

  • Yes / if it’s a nice venue

    Votes: 11 68.8%
  • No

    Votes: 4 25.0%
  • Yes / if it was free

    Votes: 1 6.3%
Back
Top Bottom