🛠️ Member Build Overtrail Upgrades

�Member Build
The wrap guy showed me what he used....it's a very thin border tape that actually cuts the wrap when you pull it up. So he carefully laid out the border tape to the desired shape, then applied the wrap a bit bigger than what was needed, then pulled up the border tape and it cut the wrap to the exact desired size.

It's not quite square and there is a bit of ambiguity about where you start and stop the lines (how far into or up the curved sheet metal you want to cover with black).

I just checked the link for my steering wheel cover in my email from when I ordered the cover - the link is dead. Reach out to Stickerfab and I'm sure they'll help you find it.
That cutting tape is pretty cool. Over the last few years I've watched too many YouTube vinyl wrapping videos and now I'm always looking at stuff and thinking "I could wrap that!" I did a bunch of interior panels in our old 4Runner Limited which had a weird fake not-exactly-wood finish, and it was a huge improvement.
 
Last edited:
I wish I could have stayed and watch the wrap guy do his thing but I didn't have the time. I know I paid too much for the hood blackout (about $250) but the truck was new and I wanted it blacked out and no one had done it yet. When I look very closely at it, I can see where he let the black run a few mm high up the curved raised-deck portion at the passenger side front. I also wanted the black to extend forward a bit more but it was defined by the clear-PPF wrap on the front of the truck.

I have about 16,500 miles on the truck now and it will be 1 year old on June 7th. I'm going to get it into my buddy's detail shop here in the beginning of June and have him detail it and re-apply the ceramic coating. I'll have him renew some of the clear PPF too as some edges are lifting around some of the tightly-curved front end openings. Some bug guts have gotten worked into the edges up there. I've done about 750 miles around northern AZ this past week for work and the front end was absolutely plastered with bugs. I'm inpatient so I take it to the coin-op car wash and blast the front with the pressure washing wand. Not very good for the PPF. But amazingly, the hood black wrap is in perfect condition.
 
I saw an ad for a pretty cool product innovation and I jumped on it. Price was way steep at $172 delivered but oh well, all this stuff is expensive nowadays.

Link to product:
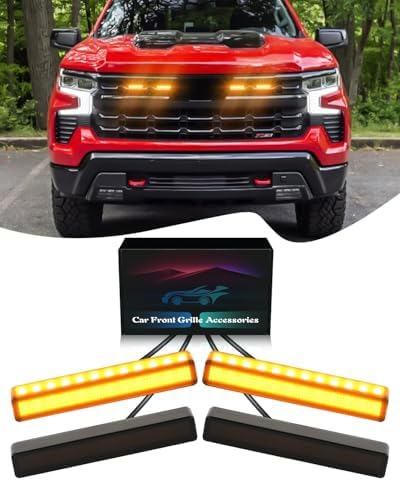
Introducing the Overland Kitted Stealth Folding MAXTRAX® Mount

The company is Overland Kitted and they are actually just up the road a ways in Prescott, AZ. I was much happier to know that I'm supporting a made in America and even made in Arizona product instead of some cheap china crap.

Ever since I got stuck way out in a desert wash near Four Peaks, AZ in my old Land Rover LR4 back in June 2022, and there was nothing but Saguaros to anchor my winch line to, I've been carrying 2 traction boards. I'd never anchor to a Saguaro...bad karma.
IMG_6290.JPG


I've used them once since then when I stupidly high-centered on rocks and gravel in another wash outside of Lake Havasu City (again with nothing to winch to) and they worked remarkably well.
IMG_2932.JPG


I had previously been strapping my 2 Maxtrax MKII traction boards to my roof with 2 cinch straps (as pictured above). I cut down 2 straps to just the right length for the job but it was still a major PIA to stand up on the rock sliders or step stool, lean over the black roof rack that turns into a hibachi grill in the Arizona sun, and strap down the traction boards. If you have to use them, then you get to experience the PIA all over again while stuck in the sand or gravel.

I wanted to install the convenient pin mounting system, but that would mean that I have these stupid pins sticking straight up a good 4 or so inches off my roof rack. I wouldn't fit in my own garage or parking garages. No bueno. Then I saw the ad for Overland Kitted's folding pin mounting system and it was like dark clouds parting and the baby Jesus smiling down on me amidst rays of golden sunshine. Take my money.

It took a little mental gymnastics to get the 2 mounts perfectly spaced and rigidly mounted to my cross bars. I thought about mounting them lengthwise and parallel to the long axis of the vehicle, but the distance between the fixed cross bars didn't quite work. You can flip the mounts around 180-degrees to change the mounting span, and I could manipulate the cross bars a bit by moving 1 or 2 forward or back a bit, but I actually like having the traction boards mounted forward, perpendicular to the long axis, and out of the way of the rest of the rack.

Westcott says that the correct bolt size to fit in their rack channels is 1/4-20 which is a coarser thread than 1/4-28. The bolt-head size on the finer thread 1/4-28 is just a bit bigger than the bolt head on the 1/4-20. I had a few 1/4-20 bolts and they slid into the channels fine but I wanted to get all new grade 8 nuts & bolts. So I remove a cross bar and go over to my local Ace Hardware. I find the 1/4-20 grade 8 bolts and a few of them slide in but most don't. Some are a few micrometers smaller than the others. So I just buy the 6 bolts, nuts, and washers that I need (3 per mount) and head home. It took a little grinding down of the bolt head to get them all to slide relatively freely.
IMG_6057.JPG

IMG_6066.JPG

I don't know why I was surprised when the bolt went from room temperature to 10,000 degrees F in 2 seconds.
IMG_6062.JPG

IMG_6054.JPG


Since the Westcott rack has 2 channels on each crossbar, I decided to add a 3rd mounting bolt to each mounting plate which necessitated a hole drilled in each plate.
IMG_6069.JPG


Annoyingly, the Westcott rack's cross bars do not have any cut-outs that let you drop in anchor bolts. You have to unscrew the 2 side bolts and lift up the cross bar to slide the bolts in the exposed ends. I tried to drill a 1/2" diameter cut-out in the channels in the middle of the cross bar but I really roached it on my first and only attempt. There's no way I could hold the drill steady when I'm trying to use the drill bit to cut into the sides of a cut-out channel. I obviously need to buy a drill press so I can clamp the cross bar down and then lower the drill bit slow and steady so it doesn't jump. I'm not showing photos of my amateur attempt as I really scored the aluminum. I just flipped the cross bar over so my shame will not be seen by anyone who happens to be on top of my truck.
IMG_6071.JPG

IMG_6073.JPG

IMG_6078.JPG

IMG_6076.JPG

IMG_6077.JPG

IMG_6080j.jpg

Now I have room on the mounting plates for 2 more traction boards so maybe I'll blow another $300. Or maybe I'll see if I can cut down the pins to they only fit 2 boards...
 
I really didn't need to learn about Sticker Fab today. I am now shopping for knick-knacks and a steering wheel cover that apparently I didn't know I needed. I like those topo vinyl stickers to protect the seat belt from banging against the hard plastic. My goal was to stop shopping for upgrades after my PPF install, which I am about to drop the car off today.
Who is doing your PPF in Raleigh?
 
Is there a reason you used Grade 8 bolts? A 303 stainless 1/4-20 is good for over 2,000 pounds in tension and over 1,400 pounds in shear, and with 3 bolts per bracket you could pick up the truck with one bracket. I guess in AZ, corrosion of fasteners is not much of an issue compared to those of us near the ocean.
 
Is there a reason you used Grade 8 bolts? A 303 stainless 1/4-20 is good for over 2,000 pounds in tension and over 1,400 pounds in shear, and with 3 bolts per bracket you could pick up the truck with one bracket. I guess in AZ, corrosion of fasteners is not much of an issue compared to those of us near the ocean.
Ace Hardware only had two 1/4-20 stainless bolts in stock and they fit even worse (bolt heads too big) than the grade 8. No other reason than I have to have everything match and I found that some of the grade 8 bolt heads actually slid in the channel off the shelf. I use the black oxide for the sides of the rack so they blend in but the damn black oxide bolts will rust where you rub it down to bare metal with tools and you then have to touch it up with Testor's black model paint!
 
Decided to try one of the 3D-printed magnetic phone mounts where the base mounts in the 12-volt plug in that weird wasted space in the center console. For the past year I've been using a magnetic charger that I stuck on there with double-sided tape but I was kind of tired of seeing the cord and having the extra cord hanging down into the passenger footwell.

The new mount works pretty good - it's a bit loose in the 12-volt plug and the phone flops around a bit. Of course you can only get the apple iphone magsafe charger in white and I couldn't abide by a white cord on my black dash so I took matters into my own hands.

The old setup:
1-phonemount1.JPG


The new setup with white cord:
A.JPG

B.JPG


With black cord and the black sticker that comes with the kit:
C.JPG

D.JPG


The secret to the black cord:
E.JPG
 
Thanks!

No kickout

less expensive material & welding process

zero degree angle (flat step)

with top plates

powder coated black

I don't think hardware was an option when I bought them - I just let them know I had an Overtrail with stock GX550 rock sliders
 
I have stock Skid plates - three of them back to the cross member, why did you change to the NYTOP skid?
Couple reasons for the expanded plate. First, it covers the Cat to prevent theft and 2) Fire prevention. In CA we've had several incidents when folks have pulled off the highway into high grass which hits the cats and starts a fire.
 
Thanks for your reply. Bluegill - I took your advice and ordered the Westcott Design Sliders to replace the original rock rails. 6 weeks out. I have been looking at the NYTOP plates but noticed that Victory's plates extend to cover the transfer case - any thoughts on this? While I was ordering the Westcott sliders, I asked Jason about a bumper system that had an integrated brush guard. He said he would hold off for about a year as his design staff said that there were others in development. What are your thoughts? I looked at the Dissent but am not looking for something with that high of clearance.
 
I’ll be curious to see what Westcott comes up with as far as bumpers are concerned. I’m fine with my bumper from JW Offroad - it was one of the earlier front winch bumpers available and I wanted a winch ASAP. I certainly won’t be opposed to changing it out in the future. I will also surely need a steel rear bumper in the future and also probably a swing-out tire carrier, as much as I don’t want to got that route. Larger tires will necessitate a tire carrier, as probably will an extended range fuel tank.
 

GX550 Poll

  • When its stock

  • After you add some offroad lights

  • Once you do a collar lift, OE tires or any tire 33inch and less

  • A true lift with aftermarket suspension and 34s+

  • Lift, 35s+, rack, lighting, mole panels, spare wheel and carrier

  • None of the above


Results are only viewable after voting.
Back
Top