🛠️ Member Build Munkeeboi's Nori GX (1 Viewer)

�Member Build
Wise choice to wait for better weather. I got the material in and got excited. The doors will have to wait.
 
Got some cooler weather today and knocked out the doors. I think I bought too much material or didn't use enough. :ROFLMAO:. I bought 40 sq ft and only used 20 sq ft. Anyone in SoCal want a good deal on a new 20 sq ft box? I was able to get one layer of coverage for all 4 doors and the trunk hatch with only 1 box.

Driver's side door
IMG_9210 copy.webp


Before and After

 
Last edited:
Im thinkin
Got some cooler weather today and knocked out the doors. I think I bought too much material or didn't use enough. :ROFLMAO:. I bought 40 sq ft and only used 20 sq ft. Anyone in SoCal want a good deal on a new 20 sq ft box? I was able to get one layer of coverage for all 4 doors and the trunk hatch with only 1 box.

Driver's side door
View attachment 23556

Before and After


Im looking to do this on mine, sounds tremendously better.
 
Wish you were local, I'd grab that in a sec!

Knocking on the stock door doesn't sound bad at all....until you knock on the sound-deadened door. What a difference!
 
Better late than never on tracking what I've done to my GX.

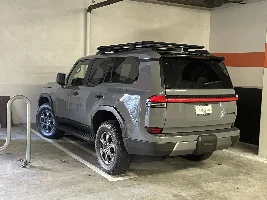
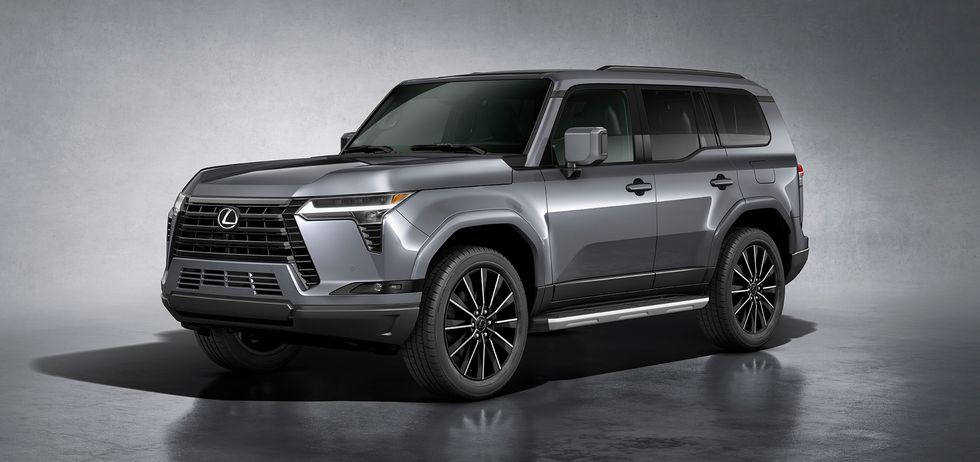
As she currently sits

2024 GX Premium +
Full Body Xpel PPF
Black PPF roof
Xpel 20% tint
OME MT64 w/ OME UCA and Icon rear 2" springs
Dr. KDSS B.O.T.C.K (Track bar Correction Kit)
Method MR703 17x8.5 +35 offset
Toyo AT3 285/75/17 (Load C)
VF Tuner tune
Westcott Roof Rack
NYTOP Front Bumper
NYTOP Titanium Dump pipe
NYTOP Catalytic Converter Shield
HYUGA Yellow fogs
Maxpider all-weather mats
Toyota Rain visors
Lamin-X Front logo Smoke tint
Landcruiser side steps
Landcruiser front mud guards
Rear Door mud guards
Beatsonic Sigma Amp
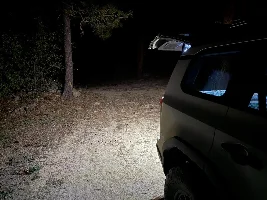
Trunk Hatch LED light
Windshield gap trim gasket
Stickerfab leather steering wheel overgrip
NVX Sound Deadening
StickerFab B-Pillar Seat belt protection Vinyl

View attachment 18943

So no issues with the spare tire while running Toyo 285/75/R17?
 
So no issues with the spare tire while running Toyo 285/75/R17?
my spare is still the 275/65/20 (33") I upgraded to when I had the Vossen's. I think I posted on another thread that the 285/75/17 will barely fit (Toyo At3), but will hang much lower in the the spare location. Just haven't found a good deal on the 5th tire and rim yet.

 
Last edited:
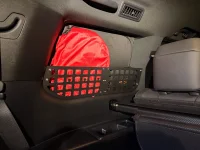
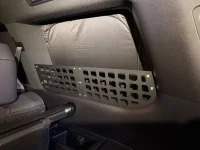
Added these window molle cubbies in the trunk to keep things organized. I rate them a 5 out of 10, a low score mainly due to the high cost for what they are. These are Chineseum alloy and is a non-intrusive install only using hooks around the plastic trim and VHB double sided tape. Once assembled, it is pretty secure in the window well and I didn't have to use all the Double sided tape they supplied. I had blackout shades already and am using that as a protective liner against the glass.

I was originally looking into the high roof molle system, but with my minimal use of the 3rd row, I couldn't sacrifice the head room.

Marketed for the LC250 and the only issue for install is that the front of the window trim is a fabric instead of plastic so that was one of the locations that I didn't use the Double sided tape.


Attachments

  • IMG_9343.webp
    IMG_9343.webp
    270.6 KB · Views: 975
  • IMG_9342.webp
    IMG_9342.webp
    249.4 KB · Views: 37
Last edited:
Looks great! So you went with ppf in black for the roof? What life span are you hoping to get with the ppf? I am wanting to do the same thing for our roof and maybe the fender flares.

Thanks!

C
 
Looks great! So you went with ppf in black for the roof? What life span are you hoping to get with the ppf? I am wanting to do the same thing for our roof and maybe the fender flares.

Thanks!

C
Seeing that the roof would get baked in the sun, I went with PPF on the roof. Vinyl wold be toast in just a couple of years. The PPF I got has a 10 year warranty, so I hope to get that much life out of it.
 
In my case I went a different direction on roof …went with PPF on edges of roof and ceramic on the top surface for uv protection..

My thinking 🤔 is that no matter what product is applied, accelerated uv degradation is a guarantee.

Ceramic seems less likely to become a nightmare to remove.

My two cents.. no science- just subjective conjecture.. 🙂
 
Got some cooler weather today and knocked out the doors. I think I bought too much material or didn't use enough. :ROFLMAO:. I bought 40 sq ft and only used 20 sq ft. Anyone in SoCal want a good deal on a new 20 sq ft box? I was able to get one layer of coverage for all 4 doors and the trunk hatch with only 1 box.

Driver's side door
View attachment 23556

Before and After


Is there a noticeable difference while on the road?
 
Got some cooler weather today and knocked out the doors. I think I bought too much material or didn't use enough. :ROFLMAO:. I bought 40 sq ft and only used 20 sq ft. Anyone in SoCal want a good deal on a new 20 sq ft box? I was able to get one layer of coverage for all 4 doors and the trunk hatch with only 1 box.
Driver's side door
View attachment 23556

Before and After


Might be interested in your leftover 20sqft box! Do you still have it?
 
HYUGA TF1 yellow fog bulbs. Much brighter than the stock lights. Comes in white as well as well as a new amber/white switching version

how long did it take you to change. How difficult is the job and did you order the exact one in this link because it does not show for a Lexus GX 550. Thanks
 
how long did it take you to change. How difficult is the job and did you order the exact one in this link because it does not show for a Lexus GX 550. Thanks
It’s a 15 min per side job. Mostly removing the fasteners in the wheel well and turning the wheel to get clearance. It helps to also remove the turning light to access the fog light better.

The TF1 is the correct bulb and I did buy direct from that link. They have other options now like dual color bulbs but I prefer yellow all the time.
 
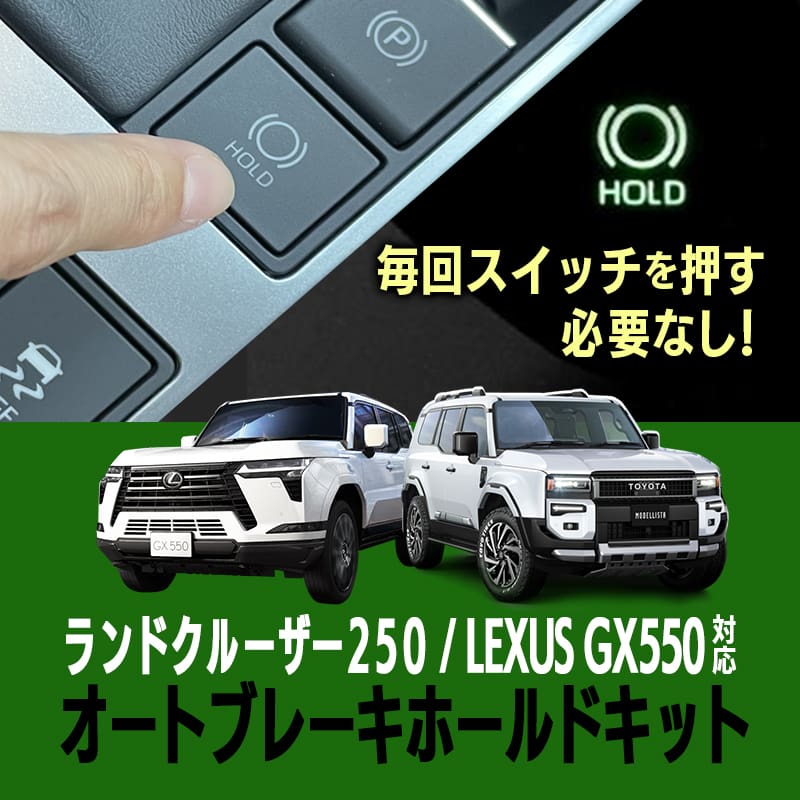
Forgot I had this installed - Enlarge Auto Brake Hold Kit

This enables the brake auto hold at stop lights so that you don't need to keep your foot on the brake pedal. Stock, you have to press the button each time you start your car to enable.


install difficulty is a 3/10. Most of it was working with the trim pieces on the center console and around the steering wheel in my work's dark subterranean garage. The "leather" trim around my shifter was loose around the 4WD selector buttons and I had to tuck it back in while reinstalling it. Comes in with factory plug in harnesses so it's completely plug and play and reversible. PM if you need help

Other than the trim removal/install, the install dissimilar to the the LC250. Activates after you turn on the car and put on your seatbelt. Not for everyone, but now I can drive the GX like I do the rest of my cars without having to press a button everytime

Steering wheel
  • You have to pull the top panel of the steering column off (behind the camera and in front of the Dash display), pull upward. it stays connected via the vinyl "curtain" material. Just move it out of the way
  • There are 3 phillips head screws you have to remove from the covers. 2 behind the steering wheel (have to turn the steering wheel to access) and one on the bottom side.
  • Separate the upper and lower portions (there are clips you can access from the top after removing the top panel). You'll have to slide the lower portion over the Steering column knob on the left side.
  • The plug you need to access is the white one on the underside of the steering column.

Shifter console
  • You have to pull the panel at your right knee straight out towards the drivers side door.
  • The shifter console is 2 pieces and is clipped in. 1 piece for the "leather" trim and 1 for the Shifter assembly. I just popped up both one at a time(pull straight up). I only popped them up enough to access the needed plug
  • You are looking for the black plug underneath the Electronic parking brake and the Brake hold button.
  • The release button for the clip faces the passenger side. install the harness and tuck away. run the yellow cable towards the front of the car
  • nows a good time to connected the yellow wires together and see if it works.
  • Start GX, Close driver door and insert seat belt. "HOLD" should be automatically pop up on your dash.

- if everything is looking good, run the yellow cable behind panels toward the steering wheel, I pulled out the Tow brake controller (pull straight out towards the rear) to have more room to work in. Fish the yellow cable through, zip tie as needed and have a beer.

Reinstall in the reverse order

- Not sure if this was just on mine, but the leather trim panel around the shifter had loose edges (the edges were not glued down) around where the 4WD switches are. I had to use a small pry tool to tuck them in around the buttons while reinstalling the trim. This part was the hardest of the install. You have to reinstall the leather trim section by section while using a tool to tuck in the excess material around any buttons while pushing down

 
Added the Toyota rain guards. I love how low profile they are.

Toyota logo - 08162-60840
Lexus logo - 08162-60850
Very nice rain guards...can you share where you picked yours up from and if it made a difference when you drive around with the windows slightly cracked open
 

Similar threads

Users who are viewing this thread

GX550 Poll

  • Yes, I can pick up in Los Angeles (Burbank area)

    Votes: 7 41.2%
  • Yes, but I need it shipped.

    Votes: 10 58.8%
Back
Top Bottom